

Trade Show Event Planning: The Complete Organizer's Guide (From Kickoff to ROI)

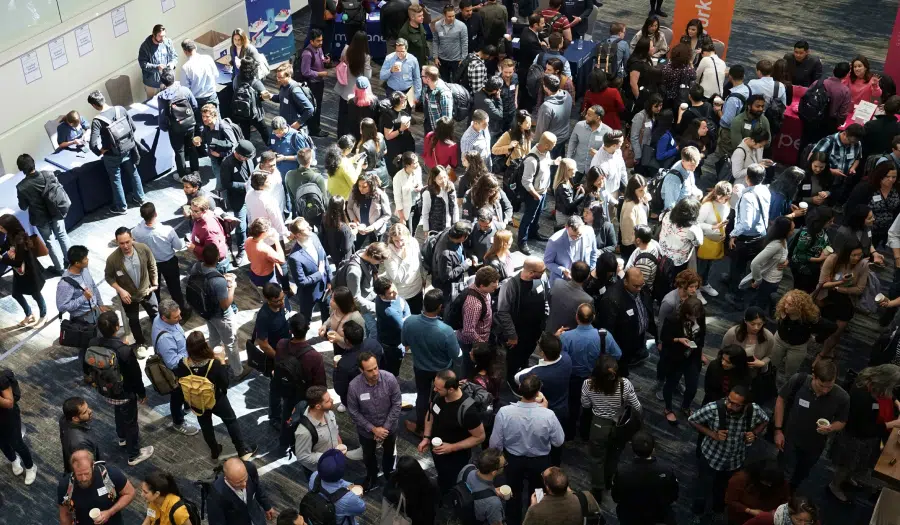
Trade show events are won or lost in the planning stage. Every decision, from exhibitor coordination and sponsor management to registration and lead capture, determines event success.
That’s why top organizers rely on the right processes and technology to carry them through every step of the process. In this EventsAir guide, we’ll walk through the key steps of trade show event planning. We cover the metrics that matter most and common mistakes to avoid so you can deliver a seamless event and maximize ROI.
What to prepare for when planning a trade show event
Understanding what goes into a successful trade show event helps you anticipate and plan proactively. Here are four things to keep an eye on:
1. Multiple stakeholder groups
Trade show events serve a wider audience than most events. Attendees, exhibitors, sponsors, media, VIPs, and speakers all show up with different goals. Unlike a conference or gala, every group expects measurable outcomes.
This makes alignment and segmentation critical. Setting measurable goals for each group and automating registration and communication paths guides them towards expected outcomes without manual strain on your team.
2. Complex exhibitor requirements
Exhibitors aren’t a single audience with one shared goal. A Freeman Exhibitor Trends survey found that 35% of exhibitors prioritize lead generation, while brand impact and sales follow at 25% and 24%, respectively.
To support these varying goals, exhibitors need the flexibility to tailor their event experience. Self-service tools give them that flexibility. They allow them to manage booth upgrades, branding opportunities, and lead retrieval on their own. This reduces manual oversight and speeds up coordination for organizers.
3. Sponsor deliverables
These days, sponsors look for proof of value, on top of logo placement and brand visibility. Yet, Vendelux’s 2026 B2B Events Survey found that 86% of organizations can’t attribute ROI back to events, even as 80% hold or grow their sponsorship spend.
One reason is that sponsorship deliverables are often managed across multiple tools and spreadsheets. A structured system keeps every commitment in one place. It also makes reporting easier. This way, organizers can clearly show sponsors what they received and the value it delivered.
4. Large-scale attendee management
In a Freeman survey, 85% of attendees who had a peak moment said they were likely to return. This highlights how important attendee experience is at any event, including trade shows.
Meanwhile, trade show events typically attract massive crowds, creating pressure on event registration, check-in, communications, crowd flow, and onsite support. To handle the volume, you need automated check-in, self-service kiosks, and real-time attendance data to give you insight into event performance without constant in-person checks.
How to plan a trade show event in 10 steps

Trade show event planning requires high intentionality and follows a logical sequence. Below, we’ll explain how to plan a trade show event in ten steps, so your event stands on a solid foundation and gives you your desired results.
Step 1: Set event goals and KPIs
Before booking a venue, setting dates, or making any plans, you must be clear on what success looks like for your organization. Define what you expect to achieve with the event. Ensure this goal is tailored to your organization’s precise needs.
Specificity is key at this stage. Vague goals make it impossible to know whether the show worked. Each goal should be tied to a clear KPI. This could be lead volume, registration numbers, booth sales, attendee involvement and satisfaction, or sponsor renewal rates. Clear KPIs make it easier to evaluate event performance after the show.
Finally, revisit your goals at every major planning checkpoint. Regular reviews make it easier to identify gaps and course-correct early if something’s off track.
Step 2: Create your budget
Once your goals are set, it’s time to assign resources. A strong budget covers both how much you plan to spend and how those funds are distributed.
Prioritize spending that supports your must-have goals. These allocations should be reviewed and adjusted as registration numbers and sponsor commitments come in.
For trade show events, budgets usually cover:
- Venue and floor space rental
- Booth design, build, and signage
- Shipping to move materials to and from the show floor
- Sound, visuals, lighting, and staging
- Staffing, travel, and lodging for your team
- Marketing and pre-show promotion
- Event technology, including registration, lead capture, and badge printing
- Sponsor and exhibitor incentives
- Onsite services such as catering, security, and crew labor
- Contingency fund
Your budget won’t stay the same from start to finish. It will need to be reviewed regularly as commitments evolve. EventsAir’s finance tools make it easier to track event revenue, payments, and budget-related data in the same system you use for registration and reporting.
Step 3: Build your event technology stack
Your technology stack is the basic infrastructure that runs your entire event’s operations. A poor choice translates to disjointed processes, a confused team, dissatisfied sponsors, and disengaged attendees.
Look for a platform that supports your event goals in one connected system. The fewer tools you’re juggling, the less time your team spends on data entry and reconciliation later.
EventsAir brings key trade show functions together in one platform. Registration, exhibitor management, lead capture, and event reporting all work from the same data, giving your team a smoother planning process and more reliable reporting.
Step 4: Select the venue and create the floor plan
A comfortable venue adds to both attendees’ and exhibitors’ experience. When evaluating venues, consider factors like the total cost, ceiling height for signage or overhead displays, and built-in power, AV, and internet support to prevent extra costs.
Things like column placement and structural obstructions could affect booth setups. Also, consider aisle width requirements and safety code compliance, including accessible-width aisles. Tightly-packed spaces mean attendees spend more time figuring out how to navigate your event than exploring offers, while a sparse hall dampens morale and wastes resources.
Once the venue is set, build your floor plan around traffic flow first. Afterwards, you can layer in event branding and booth assignments. Here’s how to create your floor plan:
- Design wide, clear main aisles that route attendees naturally past as many booths as possible
- Place anchor or sponsor booths along main paths and near entrances, not in corners where traffic naturally drops
- Avoid dead ends or secluded zones. Alternatively, place crowd pullers like stages or lounges in such areas.
- Keep delivery routes separate from prime booth space to avoid disruptions
- Confirm weight limits before allowing hung signage
- Number each booth clearly by row or section, with a simple map for both exhibitors and attendees
Tip: Floor plans change as sponsors confirm, upgrade, or drop out, but you must maintain accuracy regardless. With EventsAir’s interactive floor plan and booth booking tools, exhibitors and sponsors check availability and book their own space, while your team manages allocation and revenue from one place.
Step 5: Recruit sponsors, exhibitors, and speakers

Sponsors and exhibitors are key revenue drivers for trade shows, but they must align with your audience and event goals. Before reaching out, create a prospectus that outlines your exhibitor criteria, pricing, booth options, benefits, and deadlines. How well an exhibitor fits these requirements tells you whether to proceed with the partnership or not.
Similarly, speakers should get the same early attention, especially if your trade show includes educational content. Lock in keynotes as soon as possible, align topics with your audience, and set firm deadlines for bios, headshots, and session details. Brief rehearsals before the show also help catch equipment issues before the event day.
Once they’ve all been secured, the next challenge is staying organized. Contracts, booth assignments, marketing materials, and deliverables all need a home before the busy weeks hit. Platforms like EventsAir offer dedicated sponsor and exhibitor management tools that keep everything centralized and easy to manage.
Tip: Take the time to craft a compelling outreach email when requesting sponsorship. Personalizing your outreach to potential partners will always be more beneficial than a blanket catch-all send. We’ve created a bunch of templates to help with your sponsorship requests here.
Step 6: Launch attendee registration
Registration is the first time attendees interact with your event. The experience needs to be simple, clear, and flexible enough to handle different attendee types. Secure payment processing and clean data collection are also non-negotiables.
Conditional logic is your best tool here. Use it to build separate registration paths for each attendee category, with tailored questions, session details, and pricing for each one.
You can also set up automated confirmation emails to reduce manual work. But add a personal touch so they don’t feel like system messages. EventsAir lets you build all of this without a developer, syncing data to your CRM in real time.
Before going live, test the full journey yourself to ensure its clarity. Once registration opens, track where people drop off and address complaints as quickly as possible.
Step 7: Plan lead capture and retrieval
Lead capture and retrieval tells you if exhibitor activity actually results in the desired outcomes. The goal is to make it easy for exhibitors to collect, qualify, and act on leads without slowing down the attendee experience.
Start by deciding how leads will be captured and how they’ll reach exhibitors after the event. QR scanning, custom qualification questions, and real-time access are the most common methods.
Whatever you choose should connect directly to your registration system so exhibitors aren’t managing a separate process on top of everything else. EventsAir builds lead capture directly into the attendee app, keeping scanning, qualification, and automated follow-ups in one place.
Step 8: Promote the event
No amount of planning fills seats on its own. Event marketing is what drives awareness and turns interest into registrations.
To run a campaign that converts, you need a strong core message that speaks to your target audience, clearly explaining what your trade show event offers and why it matters to them. From there, build a multi-channel campaign across email, socials, and your event website, with a dedicated landing page where people can register directly.
To stay relevant, segment by audience type, and get sponsors, speakers, and exhibitors promoting to their own networks too. As the date approaches, layer in countdown reminders and track engagement data, refining your messaging based on what actually converts.
Step 9: Execute the event
With proper planning, attendees, exhibitors, and speakers should all move through the event without friction. This requires clear roles, fast communication, and systems that can adapt in real time.
From check-in to session delivery, every touchpoint needs monitoring and support to resolve issues without disrupting the attendee experience.
Steps to follow during execution include:
- Ensure smooth attendee check-in and badge printing
- Coordinate staff and volunteer teams using organizer apps
- Monitor schedules, session flow, and participation
- Support exhibitors with booth setup and operational needs
- Handle onsite communications such as alerts, announcements, and updates instantly through your event apps
Tip: Streamline onsite operations with an event management platform that supports fast attendee check-in, badge printing workflows, and real-time event management. EventsAir’s live event technology works with a wide range of registration hardware –including self-service kiosks, scanners, and badge printers – giving organizers the flexibility to choose the equipment that best suits their event.
Step 10: Measure results and follow up
A trade show’s success isn’t just measured on the day. What happens after determines whether stakeholder goals were met and what needs to improve next time.
Here’s how you generate event insight:
- Track attendance, engagement, and session performance data
- Review sponsor and exhibitor ROI and lead conversion numbers
- Compare results against your original goals and KPIs
- Collect attendee, speaker, and exhibitor feedback through surveys
- Generate post-event reports for stakeholders and partners
- Segment audiences for targeted post-event communication
- Follow up with leads, thank-you messages, and next-step content
Keep in mind that disconnected systems leave room for errors in data management. EventsAir’s unified reporting and analytics tools include real-time dashboards, 150+ report templates, and shareable breakdowns to help you demonstrate clear, accurate ROI.
Trade show event planning timeline
A clear timeline keeps every team, from exhibitors to onsite staff, moving in sync as the event approaches. Below, we’ve provided a trade show event planning timeline you can use as a starting framework and adjust based on your show’s size and complexity.
- 12 months before the event: Define your goals, KPIs, and budget. You’ll also want to secure your venue and build your core planning team. This is also the time to start exhibitor prospecting and select the event technology platform you’ll manage everything else through.
- 9 months before the event: Open exhibitor and sponsor outreach, publish your floor plan for booth selection, then launch attendee registration and reminders alongside your event website. Early promotion should start here too, so awareness builds well before the event.
- 6 months before the event: Confirm exhibitor commitments and branding submissions, then expand promotion across email, social, and PR. Configure lead retrieval tools and your event app now, so exhibitors and attendees have what they need before the show.
- 3 months before the event: Finalize your floor plan, confirm logistics, and lock in exhibitor staff registrations and badge allocations. Set up your on-site communications and check-in workflow, then brief your team on their roles.
- 1 month before the event: Print badges (if you aren’t printing onsite), finalize attendee communications, and confirm final exhibitor requirements. Test your check-in kiosks, lead retrieval tools, and event app so nothing surprises you onsite.
- During the event: Oversee check-in, support exhibitors on the floor, and monitor attendance and lead capture data in real time. Daily team debriefs help you catch and fix issues before they spill into the following day.
- After the event: Send attendee and exhibitor surveys within 48 hours, while feedback is still fresh. Analyze results, deliver sponsor ROI reports with lead data, and share a full report with stakeholders.
Which trade show KPIs should you track?

To move from assumptions to objective measurement, you need to know what to track in a high-activity environment. Below are the core trade show KPIs to take note of:
1. Registration and attendance
Registration shows demand and those who have indicated interest in your event. Attendance shows how much of that interest actually converts into turnout.
Tracking both gives you insight into your reach, funnel performance, and drop-off points. For example, low attendance despite high registration often points to issues with communication, timing, or event accessibility. This insight helps you refine your marketing plan and forecast more accurately.
2. Exhibitor participation
Exhibitor participation measures how many exhibitors signed up, how actively they engaged, and whether they utilized their booths and opportunities fully. It reflects how attractive and commercially relevant your event is to exhibitors.
Strong participation signals clear value and ROI for exhibitors, while weak numbers suggest poor targeting or insufficient support.
3. Sponsorship performance
This metric tracks whether your sponsorship package delivered on promised benefits like visibility, engagement, and lead generation.
High performance shows that sponsor goals align with event results. But weak performance suggests misunderstood expectations, low attendee interaction, or poor lead capture, all of which affect renewal odds.
4. Lead generation results
This KPI directly measures how many qualified leads exhibitors and sponsors captured during the event. Beyond lead capture, it also includes lead quality, follow-up rates, and conversion outcomes after the event.
High lead generation shows strong connections and interaction. However, low numbers often signal slow booth traffic, poor targeting, or ineffective engagement tools.
5. Attendee engagement
Attendee engagement tracks how actively participants interacted with sessions, exhibitors, networking tools, and event content. This includes session attendance, poll participation, app usage, and networking activity.
When engagement is high, it means that your event is interesting and aligned with attendees’ needs and expectations. This, in turn, increases retention. Low engagement, however, suggests content mismatch, poor session design, or lack of interactive touchpoints across the event.
6. Revenue and ROI
Revenue and ROI measure the financial performance of the event. This includes ticket sales, sponsorship income, exhibitor fees, and overall profitability. It connects all operational activity back to commercial outcomes and proves that your event is truly relevant to your audience.
This KPI is essential for stakeholder reporting and long-term event sustainability. High revenue means the event is viable and worth scaling, while consistently dropping numbers could mean misaligned value or shallow research into audience needs.
Common trade show event planning mistakes

Sometimes, even experienced teams fall into common traps in trade show event planning with costly consequences. Here are some mistakes to watch for, why it matters more than it seems, and what doing it right actually looks like:
1. Setting unclear goals
Clear, relevant goals direct your trade show event and give you a result to work towards. Planning without objectives makes it difficult to make decisions about budgets, marketing, exhibitors, sponsors, and attendee experiences. It also makes it harder to measure whether the show actually had value.
Instead, define a set of measurable goals from the outset, such as attendance targets, exhibitor revenue, sponsor retention, lead generation, or attendee satisfaction.
2. Overcomplicating registration
Lengthy forms, unclear pricing, and confusing registration tools can increase abandonment rates and create unnecessary friction before the event even begins. Keep registration simple by collecting only essential information upfront and providing a clear, user-friendly registration experience.
3. Neglecting attendee engagement
Many organizers focus heavily on attendance numbers but give less attention to what attendees actually experience once they arrive. The problem is, passivity leaves attendees with little reason to stay or return to your next event.
Build in interactive moments, like networking opportunities, live polls, gamification, or a dedicated app experience, so attendees have a reason to engage beyond browsing booths.
4. Delaying exhibitor recruitment
Waiting too long to recruit exhibitors can lead to attendee-exhibitor misalignment, lower booth sales, weaker floor plans, and fewer opportunities to attract attendees. It also reduces the time exhibitors have to promote their participation and prepare for the event.
Ideally, you want to start outreach 9-12 months out. Doing this gives you ample time to find the right exhibitors and support their preparations.
5. Ignoring post-event reporting
Assuming the event concludes when attendees leave the venue is common, but without post-event reporting, you lose the data needed to demonstrate ROI to sponsors and exhibitors and refine future events.
For a stronger impact, review performance against your goals. Analyze attendee and exhibitor feedback, and share relevant results with stakeholders while insights are still fresh.
What to look for in trade show event management software
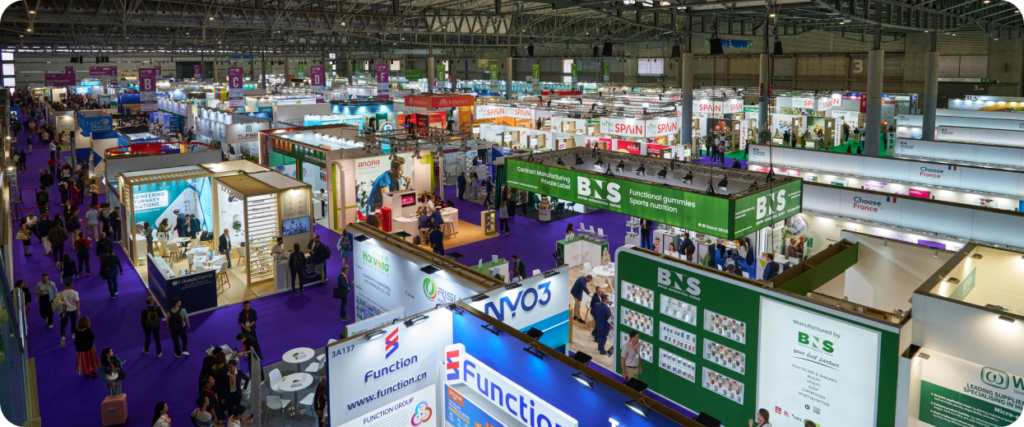
With exhibitors, sponsors, lead retrieval, and floor plans all running at once, you need a platform built for complexity. Here’s what actually matters when evaluating one:
1. Exhibitor self-service portals
Exhibitors should be able to manage their own registrations, deliverables, and booth details without emailing your team for every update. A self-service portal lets them update branding assets, submit staff badges, and confirm requirements directly, while your team keeps oversight from a central dashboard.
This cuts the back-and-forth that eats up planning time as the show gets closer.
2. Interactive floor plan and booth booking
Your platform should let exhibitors view real-time booth availability and book their own space, while you track allocation and revenue centrally. With everyone working from the same live map, the risk of clashes reduces. Floor plans rarely stay static, and manual redrawing slows you down every time something changes.
3. Fast, scalable check-in
Self-service kiosks and QR check-in keep lines moving even when hundreds of attendees arrive at once. You can pair this with a staffed backup desk to handle exceptions like badge reprints or last-minute registrations. A slow check-in process sets a bad tone for the entire event before attendees reach the floor.
4. Built-in lead capture
Exhibitors invest in events to generate high-quality leads, so your event platform should make lead capture fast, reliable, and easy to use.
Built-in lead capture eliminates the need to juggle disconnected systems, giving exhibitors a seamless way to scan attendee badges, qualify prospects with custom notes or ratings, and capture valuable information in real time. With automated follow-up emails and lead data instantly available, sales teams can start nurturing prospects while conversations are still fresh.
For event organizers, integrated lead capture also provides clearer reporting on exhibitor RO, one of the biggest factors influencing whether exhibitors renew their sponsorship or booth space for future events.
5. Integrations
Every trade show generates valuable insights, from registration trends and exhibitor performance to attendee engagement and revenue. An event platform with native integrations makes it easier to move that data into your existing business systems, reducing manual administration and helping your team produce more accurate post-event reports.
The result is better visibility into event performance and the data needed to make smarter planning decisions for your next trade show.
6. Real-time reporting
Both you and exhibitors need visibility into performance during the show. Dashboards showing real-time booth traffic, app engagement, and lead volume by exhibitors make it easy to share and analyze performance data, fix problems mid-show, and give exhibitors proof of ROI even before the event is over.
Bonus tip: Evaluating each of these separately usually means combining various software vendors. EventsAir brings floor plan booking, lead capture, ticketing, exhibitor portals, and real-time reporting into one comprehensive system, so your team manages every piece of trade show logistics without bouncing between tools. Let’s take a closer look in the next section.
How does EventsAir simplify trade show event planning?
EventsAir is a comprehensive event management software that helps organizers plan and deliver in-person, virtual, and hybrid events. It’s trusted by industry leaders who need one platform to handle it all, whether that’s small meetups or large-scale trade shows.
Here’s why organizers choose it:
- One system for the full event lifecycle: EventsAir syncs your event planning, including registration, budgeting, floor plan booking, and exhibitor setup. Eliminate disjointed systems or pricey add-ons and adjust plans seamlessly without rebuilding your entire workflow.
- Attendee engagement across the show floor: Retaining attendees’ interest on a busy trade show floor is key to event success. EventsAir’s engagement tools include live polls, Q&A, networking, and gamification features that drive participation and help you create more interactive, memorable experiences.
- Exhibitor and sponsor portals for self-service admin: Poor onsite execution affects the event experience. EventsAir’s self-service kiosks, badge printing, and organizer app let your team manage check-in, support exhibitors on the floor, and handle last-minute changes without slowing things down.
- Centralized reporting and analytics: Trade show success depends on consistent, proven value. EventsAir offers survey tools, live dashboards, and reports with registration, engagement, exhibitor, sponsor, and revenue data, making it easier to measure performance during and after the event.
Streamline your trade show event planning for higher ROI
Planning a trade show means keeping multiple stakeholders aligned without losing sight of the bigger picture. Without a centralized system, coordination and proving ROI across various groups and objectives is daunting.
EventsAir brings planning, exhibitor management, engagement, lead capture, and reporting into one platform. This gives you clearer visibility, smoother execution, and more consistent outcomes across every stage of your event.
Ready to give it a try? Book a demo to simplify trade show planning, exhibitor management, and lead capture with EventsAir’s all-in-one event management platform today.
Frequently asked questions
1. When should I start planning a trade show?
This depends on the scale of the event, but you should generally start 6-12 months in advance. Larger trade shows with multiple exhibitors and sponsors require longer lead times to secure partners and build out logistics properly.
2. What is the best trade show event management software?
EventsAir. It offers a full suite of trade show planning, logistics, and feedback features, including event apps, lead capture, exhibitor and sponsor management, and real-time analytics.
3. How do I measure the success of my trade show?
First, define the metrics that actually matter for your event. For most planners, that’s a mix of attendance numbers, exhibitor ROI, lead quality, engagement rates, and revenue.
Collect that data through post-event surveys, lead capture reports, session attendance tracking, and exhibitor feedback. By the end, you should be able to determine whether stakeholders achieved their goals and are willing to reinvest.
4. What is the biggest mistake organizers make in trade show event planning?
Relying on disjointed tools is the most common mistake. Disconnected systems create data gaps, miscommunication, and extra work that compounds as the event gets closer. EventsAir solves this by connecting registration, exhibitor management, engagement, and reporting in a unified system.
See EventsAir in action
Discover why 12,000+ event professionals trust EventsAir to deliver effortless events, every time.




Ready to transform event chaos into clarity?
With EventsAir, you’ll move from chasing logistics to creating unforgettable moments. Plan faster, act with confidence, and deliver exceptional events. Discover what’s possible with a personalized demo today.